
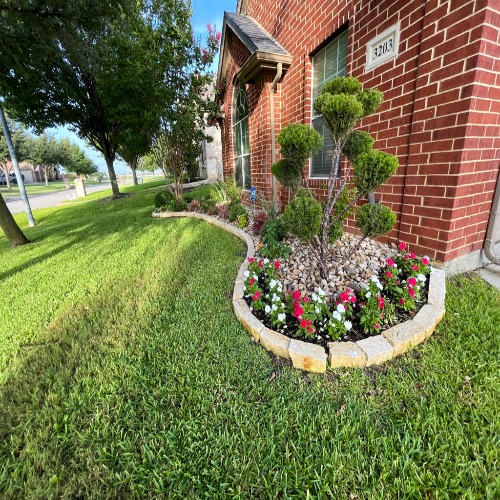
If you’ve ever tripped on a cracked concrete slab or watched a plain walkway disappear under weeds, you already know why paver sidewalk construction is having a moment. I’ve spent the last five years helping homeowners and creators replace boring, brittle paths with paver sidewalks that actually last. A well-built paver sidewalk is both durable and stylish it flexes with the ground, drains water, and gives your home that magazine-cover curb appeal. In this guide, I’ll walk you through everything: planning, materials, step-by-step installation, sealing, and maintenance. No fluff just real-world advice I wish someone had given me years ago.
Why Choose a Paver Sidewalk?
Before you grab a shovel, let’s talk about why pavers beat poured concrete or asphalt for sidewalks.
-
Durability without cracks: Individual paving stones move with soil shifts. No giant stress cracks.
-
Easy repairs: Lift one paver, fix a low spot, drop it back. Try that with concrete.
-
Style options: From classic brick to modern concrete pavers, you can match any home.
-
Permeability: Permeable pavers let rainwater soak through, reducing puddles and ice.
A durable paver sidewalk isn’t just a pretty path it’s a smart investment. When installed correctly, it can last 25–50 years with minimal fuss.
Planning Your Paver Sidewalk Design
The difference between an okay walkway and a stunning one is planning. Here’s what I do before laying a single stone.
-
Measure and mark: Use string lines and spray paint to outline the path. Walk it naturally people rarely walk in perfect straight lines.
-
Choose a pattern: Running bond is easy and modern. Herringbone is tough and classic. Basket weave suits brick. For high-traffic areas, herringbone interlocks best.
-
Pick your pavers: Concrete pavers are budget-friendly and come in many colors. Clay brick pavers offer timeless warmth. Natural stone pavers (like travertine or bluestone) deliver high-end style but cost more.
-
Plan for drainage: Slope the sidewalk about 1/4 inch per foot away from your house.
A quick tip: buy 5–10% extra pavers for cuts, mistakes, and future repairs. Trust me, you’ll need them.
Materials and Tools You’ll Need
Here’s your shopping list for a standard paver sidewalk installation.
Materials:
-
Pavers (concrete, clay, or stone)
-
Gravel base (crushed stone, 3/4 inch minus)
-
Bedding sand (coarse concrete sand, not play sand)
-
Edge restraints (plastic, metal, or concrete)
-
Landscape fabric (optional, for weed-prone soil)
-
Polymeric sand for joints
-
Paver sealer (optional but recommended)
Tools:
-
Shovel and wheelbarrow
-
Plate compactor (rent one—it’s worth it)
-
Hand tamper
-
Level and string line
-
Rubber mallet
-
Masonry saw or angle grinder with diamond blade
-
Push broom
-
Safety glasses and gloves
Step-by-Step Paver Sidewalk Construction
Now the fun part. I’ll break this down into six clear steps. Follow them in order, and your paver sidewalk will stay level and beautiful for decades.
Step 1: Excavate the Area
Dig out the sidewalk path to a depth of 7–9 inches below the finished height. For a typical 2 3/8-inch paver, that means removing about 6–7 inches of soil plus your base layers. Keep the bottom as flat as possible. If you hit soft or clay soil, dig a little deeper and add extra gravel.
Step 2: Install the Gravel Base
Pour 4–6 inches of crushed gravel into the trench. Spread it evenly, then compact it with a plate compactor in 2-inch lifts. This base is the backbone of your paver sidewalk Installation skip it or rush it, and you’ll get sinking and shifting later. After compacting, check the slope with a level.
Step 3: Screed the Sand Bed
Place 1-inch-diameter pipes or wooden rails along the edges of your path. Pour coarse sand over the gravel, then drag a straight 2×4 across the pipes to screed the sand perfectly level. Remove the pipes and fill the voids with sand. Do not compact this sand layer you want it loose enough for pavers to settle slightly.
Step 4: Lay the Pavers
Start from a straight edge or corner. Lay pavers in your chosen pattern, keeping gaps about 1/8 inch apart. Don’t slide pavers across the sand—place them straight down to avoid disturbing the bed. Use a rubber mallet to gently tap each paver into place. Check level every few feet.
Step 5: Cut and Install Edge Restraints
Where pavers meet curves, steps, or the end of the path, mark and cut them with a masonry saw. Then install edge restraints along the entire perimeter. These plastic or metal strips keep your pavers from drifting outward over time. Secure them with spikes into the base.
Step 6: Add Joint Sand and Compact
Sweep polymeric sand across the surface, working it into all the joints. Use a leaf blower to remove excess sand from the paver faces—this is crucial because polymeric sand hardens when wet and can stain. Lightly mist the sidewalk with water to activate the sand. Then run a plate compactor over the surface (with a rubber pad if pavers are delicate) to lock everything together. Add more sand if joints settle.
Sealing and Protecting Your Sidewalk
Sealing isn’t mandatory, but it does three big things: repels stains, slows weed growth, and enhances color. Wait at least 30–60 days after installation for efflorescence (white residue) to fade. Apply a quality paver sealer with a sprayer, following the manufacturer’s instructions. For extra joint stability, polymeric sand already locks joints, so sealing is mostly about looks and stain resistance.
Maintenance Tips for a Long-Lasting Paver Sidewalk
A little care goes a long way.
-
Sweep regularly: Keep dirt and debris out of joints.
-
Re-sand joints every 2–3 years: After heavy rain or pressure washing, add a light layer of polymeric sand.
-
Pull weeds early: If any sprout, remove them before they spread.
-
Fix low spots immediately: Lift the affected pavers, add sand, and re-level.
-
Avoid harsh deicers: Use sand or calcium chloride instead of rock salt, which can damage pavers.
Cost and Value: Is a Paver Sidewalk Worth It?
For a 40-foot long, 3-foot wide sidewalk, expect to spend $1,500–$3,500 on materials if you DIY. Hiring a pro adds $3,000–$6,000 in labor. Yes, it’s more than concrete upfront, but the repair costs are near zero, and the style payoff is huge. Real estate agents consistently rank paver sidewalks and hardscaping among top curb appeal upgrades. A durable, stylish paver sidewalk often pays for itself in home value and daily enjoyment.
Conclusion
Paver sidewalk construction is one of the most satisfying DIY projects you can tackle. It’s physical work, but the result is a durable, stylish walkway that transforms your property. Remember: the base is everything, edge restraints are non-negotiable, and polymeric sand is your best friend. Whether you’re a homeowner or a content creator documenting the process, the key is patience and attention to detail. Now grab that shovel, mark your path, and build something that lasts.